How-to create Slack channel and Slack App.
In this guide, we will show you how to create one Slack channel and how to use it in SADMIN ecosystem. The procedure below, assume that you have a working Slack workspace.
Otherwise please see the How-to create a Slack workspace page. The example here have been done using the Slack web interface.
Create a channel
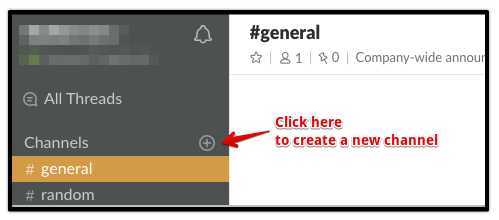
Once you have a workspace, you need to create channels to receive our alerts. Click on the ‘+’ to create a channel.
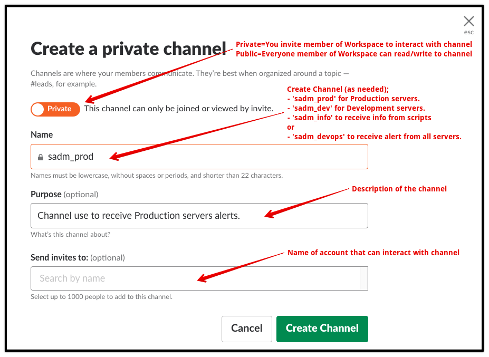
Private or Public channel
- You will be offer to create a public or a private channel.
- Public channel are accessible to everybody in your workspace.
- If you use private channel, you have to invite people to give them access to your channel.
- Beware, private channel cannot be made public later on.
Channel name
- Find the right name for a channel, in our example we’ve chosen ‘sadm_prod’.
- This channel will receive the production servers alerts.
- Channel names can have up to 21 characters in length.
- They may include lowercase letters, non-Latin characters, numbers, and hyphens (-).
- In Slack, no two channels or apps can be called the same thing.
Description
- Give a brief description of the utilization of the channel
Send invites to
- This is an optional field, you can always send invitation later on.
Create a Slack App
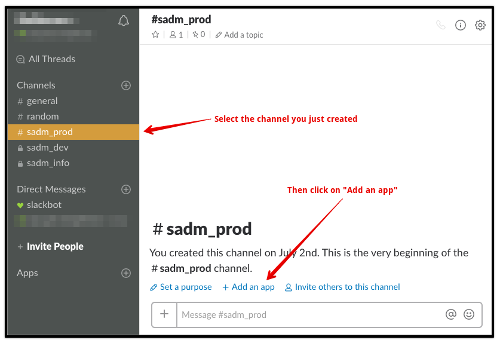
We will now need to create an ‘App’ and associate it to a ‘Webhook’. The first step is to select the channel we just created and then click on ‘Add App’at the botton of the screen.
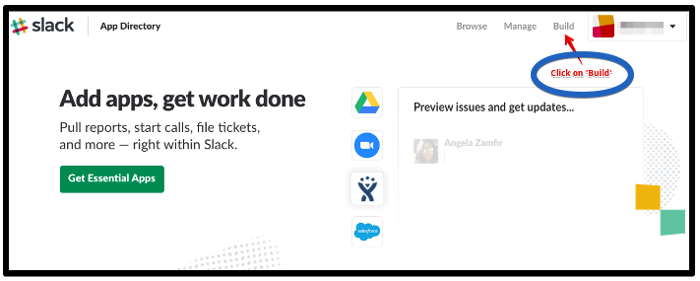
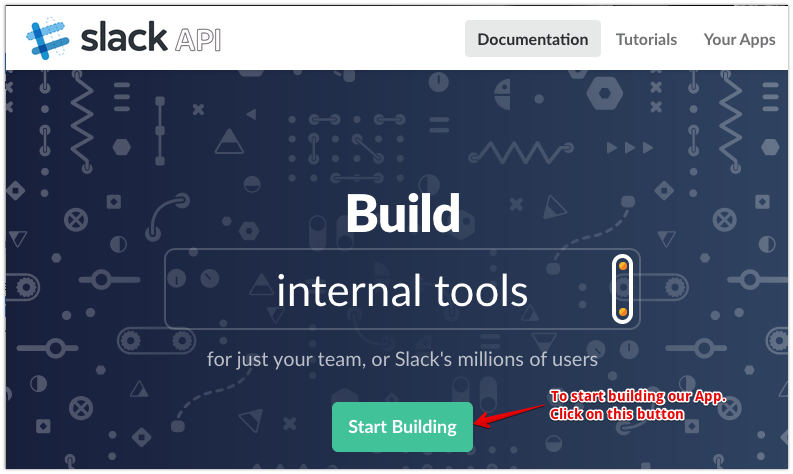
Then click on ‘Build’ button at the top right of the screen and this will bring you to the page below
Click on ‘Start Building’ to create our App.
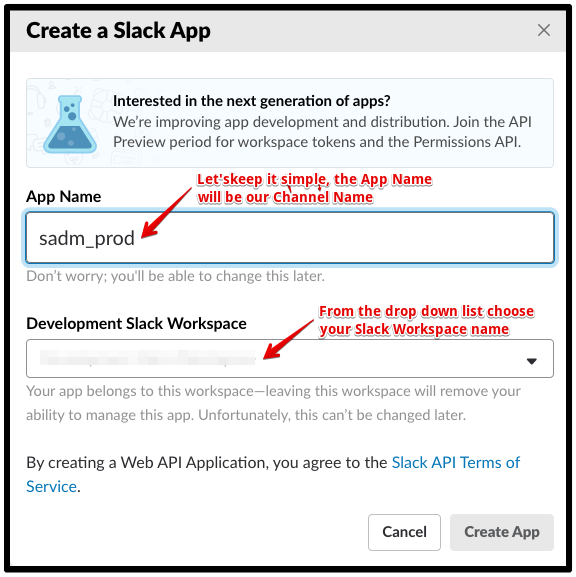
On the next screen, you need to enter the name you wish to give to your Application. To keep it simple we will give it the same name as our channel. In this case we will name our Application ‘sadm_prod’, the same name as our channel. Then select the workspace from the drop down list and click on the ‘Create App’ button.
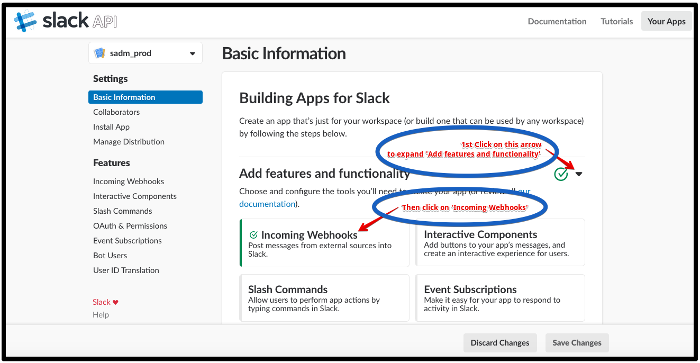
At this stage, the page below will appear. Click on the arrow at the right side of ‘Add features and functionality’. This will reveal some more options, click ‘Incoming Webhooks’ button.
Enable Incoming Webhooks
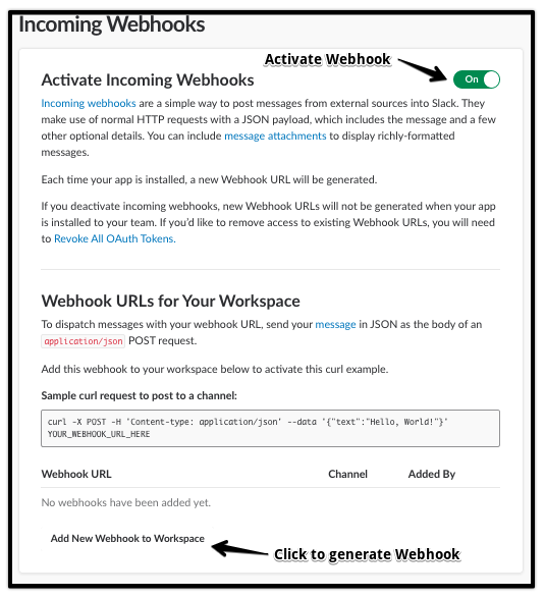
- Enable incoming Webhook by changing the ‘Activate Incoming Webhooks” button from ‘Off’ to ‘On’.
- Immediately after doing that, more information will appear below the button.
- Now click on ‘Add New Webhook to Workspace’ to continue.
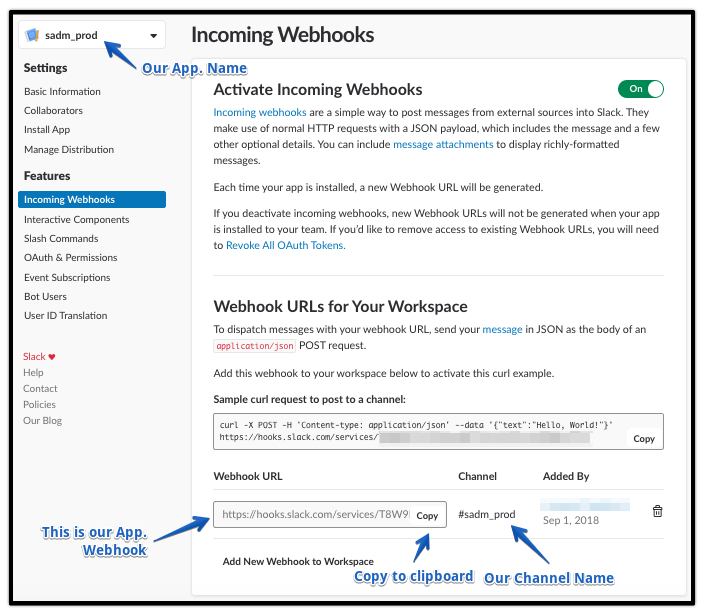
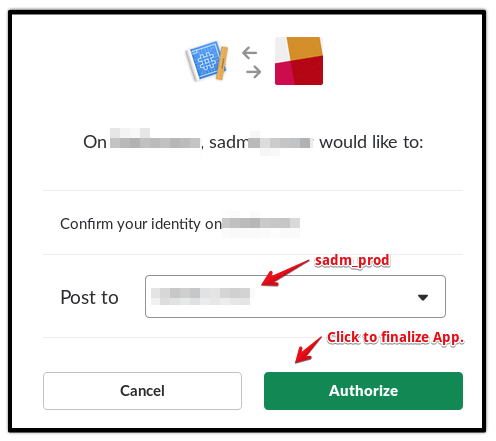
Next you should see something like the following screen:
- In the field “Post to” choose channel ‘sadm_prod’ and click on ‘Authorize’ button.
- You should now see a new entry under the Webhook URLs for Your Workspace section.
- Under Webhook URL that’ll look something like this: https://hooks.slack.com/services/T00000000/B00000000/XXXXXXXXXXXXXXXXXXXXXXXX
- That URL is your shiny new Incoming Webhook, one that’s specific to a single user, and a single channel.
- Click on ‘Copy’ to copy the Webhook to the clipboard and paste it in a save place.
Then choose ‘Your Apps’ at the top right of the screen, you will get a list of the App. your created.
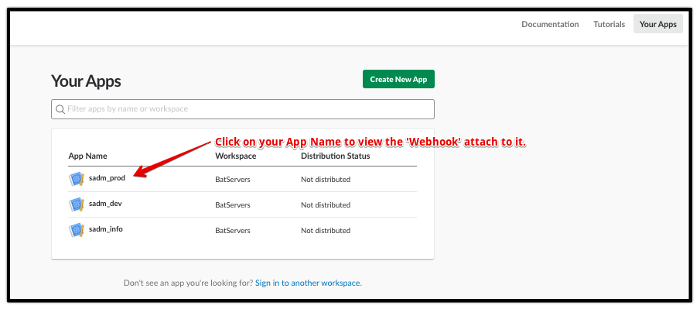
Click on one of YourApp. Name. On the next page click on ‘Add features and functionality’ & then on ‘Incoming Webhooks’ to see the page below.
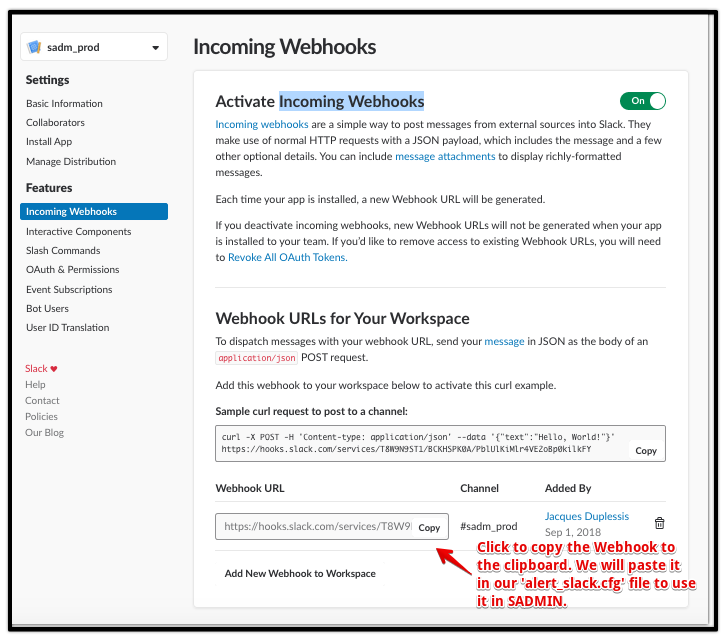
You can come back later on to this page, to get your Webhook, if you didn’t save it. It’s still time to click on ‘Copy’ to copy the Webhook to the clipboard and paste it in a save place. You can create as many channel as you like, using the same procedure.
Ok we now have our Slack channel defined, let’s see how to use it in SADMIN Tools.
Insert our Webhook into SADMIN Slack Alert file
Now we need to put our Webhook into SADMIN Slack Alert file ($SADMIN/cfg/alert_slack.cfg). With editor of your choice, we will add the two things, the name of our channel and the Webhook. In our example, we have create the ‘sadm_prod’ channel, so this will be our first column. One the same line, separated by at least one space, we insert the Webhook you have saved. So updating the SADMIN Alert file file ($SADMIN/cfg/alert_slack.cfg), it should look like this.

Defining a SADMIN alert group
Let’s define a group in SADMIN alert group file ($SADMIN/cfg/alert_group.cfg). The group name is the name that will be use by the SADMIN System Monitor and our Shell and Python scripts. There are two types of alert group in SADMIN, type ‘S’ for Slack alert and type ‘M’ for email alert. It indicate what type of alert we wish to send, more on this later on. We added a group named ‘sprod’, of type ‘S’ and the channel name ‘sadm_prod’ we just define in Slack alert file.
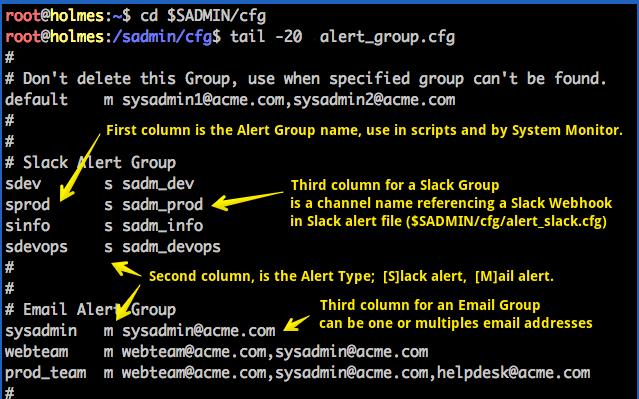
We are now ready to use the Slack alerting system. Please see the How-to use SADMIN alerting system page.
SEE ALSO
| Link to … | Description |
|---|---|
| sview | Command line summary of alerts and failed scripts of all your servers. |
| sadm_daily_report | Produce and email monitoring daily reports |
| sadmin.cfg | SADMIN main configuration file |
| sadm_sysmon.pl | Client system monitor |
| sadm_fetch_clients.sh | rsync all .rch/.log/.rpt from actives clients to the SADMIN server |
| SysMon configuration file | Client System Monitor configuration file |
| smon | Allow you run SysMon and see the report file |
| How-to create a Slack workspace | Create a Slack Workspace |
| How-to create Slack channel and App. | Configure Slack Channel |
| How-to use SADMIN alerting system | Understanding SADMIN alerting system |